Saturday, October 27, 2007

Malaysia BAKUC 2007

BAKUC stands for Bandai Action Kit Universal Cup! A competition of the best gundam kit around the world! Malaysia BAKUC is now holding in Kuala Lumpur Sungai Wang Plaza.......

I have just visited the MALAYSIA BAKUC 2007, and to be honest this year standard seems to be very high! A lot of masterpiece can be seen compare to last year!

This year as usual we get to see some work of the master! Which are really high standard indeed....the modification and all those wonderful coloring just make me want to put more time on my gundam kits! Ok cut the crap now have some look on the pic!


This year a lot of neat Zaku! Maybe is becoz this is Zaku Year like i mention back in my MG Zaku V2.0

They are a few very clean and neat MG Zeta that i personally like it a lot!


Some major moded kits are seen too this year and especially this called Recycle Hazel!


They are still a lot of pic to go but I think i would stop here the rest you guys can check it out with my slide show:


If you can't view the slide show you can see it at my webalbum:
BAKUC MALAYSIA 2007

Friday, October 26, 2007

Gundam Head Mod

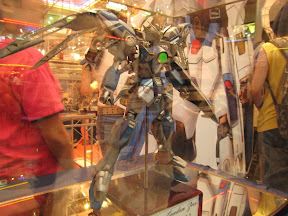
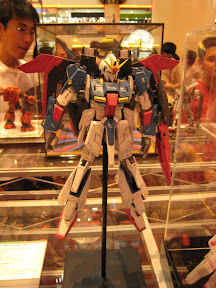
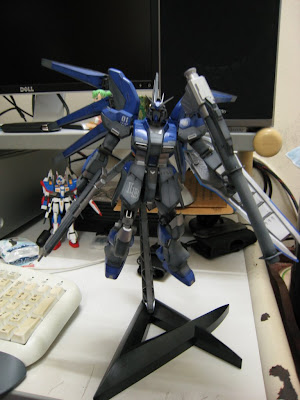
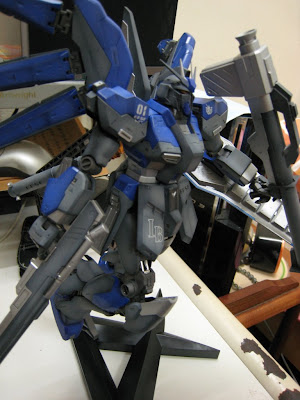
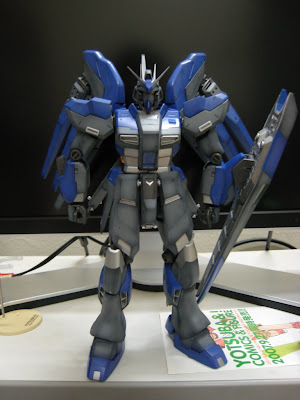
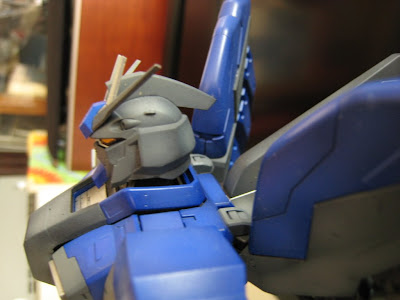
Head mod is a very usual thing modelers do to their Gundam Kit if they want to AB it or cover the joining part up more perfectly!

Remember my post on the Hi Nu Gundam! I modded the head so that the face part can slide into the helmet without having to open up the 2 parts of the helmet! What is the advantage of going through all this trouble!

1. Easier to AB no need to mask the face part!
2. U wont see the helmet joining part so clearly

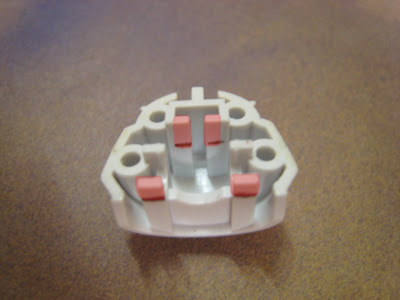
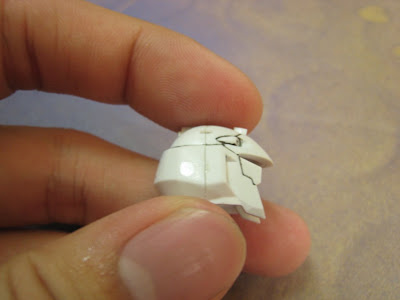
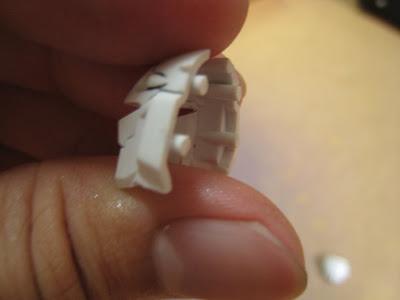
First picture u will see the back part of the helmet, the highlight in red part is to be cut off or remove!

Doing so allow u to slide the transparent part into the helmet which allows you the flexibility of pulling it in and out! If not the upper highlighted part will have your transparent part fixed and irremovable when cover with the front helmet part. The lower highlighted part is for you to slide in the polycap (same concept as the previous).


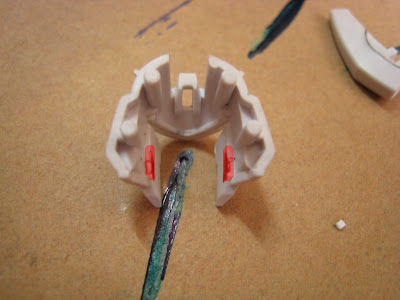
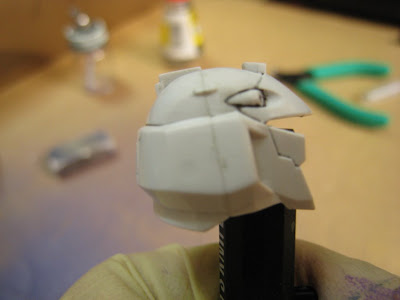
Second picture is on the front part of the helmet, slice the highlighted part to make the particular area thinner

By doing so allow you to slide the face inside easier, and you wont notice the difference looking from outside


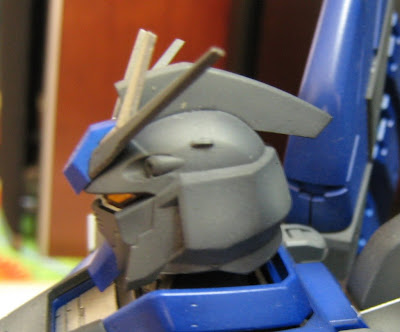
After having the 2 helmet part mod, now is time to shorten the male joint! This step allow you to have better combination of the 2 parts , you wont get to see the gap between the 2 parts!

The highlighted part is the part where I am going to cut off!


Here is how it looks after cutting off all 4 male joint!

Basically I am not going to used the male joint to connect the 2 helmet parts together tightly, but to help prevent me from gluing the parts correctly. If u completely cut off 4 of the joint it will be difficult for u to glue it helmet correctly.

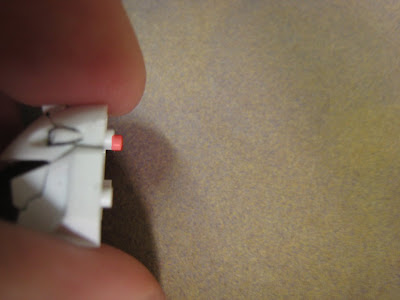
OK now that all ready, dun directly go and glue the 2 parts, you still need to test whether the transparent part along with the face part ability to slide into the helmet or not! Adjust the parts until your are able to slice the face part in to the helmet! Af


This is the pic before mod, the gap is easily notice even from a distance away


After mod, after applying the plastic cement and the sanding the part, although you see some blurry line between the 2 parts but the gap is basically disappear. (cause of the blur dark line is because my hand is dirty and wet when I modding the 2 parts)


Now after AB the helmet u get it like this! And remember I did not used any putty during this process.


It isn't a hard job and it does help a lot when you need AB. If you are not deciding to AB your kit, this mod can still be put in used for u to make the Gundam head part to cover up the gap in between without using putty (Putty with different color will ruin the original color of the part).

For those newbie in Gunpla, dun worry about the head part being very fragile or face part will drop out easily, if you didnt over slice the highlighted part that i mention back above, this situation will not happen! It is tighter than you think!

Sunday, October 21, 2007

Berjaya Times Square (BTS) Toys Shop!?

In Malaysia there are not many source to get Japanese Figure and Gunpla stuff! A lot the shop out there sell those "pirated" Gundam kits (by the name Bendi and lots lots and pirated figure.

Luckily i live in Kuala Lumpur the capital of Malaysia and in Berjaya Times Square there are 3 shops that are reliable! This are the 3 shops that i usually vist:


Time Machine located on the 7th floor of BTS.
It has a wide variety of gundam kits and some figures! It also has some Mr. Hobby acrylic paint and tools for painting your kit.


XL shop located on 4th floor.
This shop focus on selling PVC figure from Japan and this is one of its 3 outlet in KL.
You may visit their homepage for more details.


The last shop is Grafiti Toys which is located on the 5th floor.
This shop has all sort of tous from all over the world! Basically this shop take in stock in bulk, so you don't get a lot variety but a single kit in many many boxes.


The price in the shop I mention above are in the acceptable level! You would get cheap kits or figure in Malaysia, the shop above are able to provide price that are as near as the yen selling price.... so that is already the best price we can get in Malaysia!

Thursday, October 18, 2007

Bandai's Trash!? Enviroment Friendly!?

OK I am not sure about all of you Gunpla or model builder out there, but I am the type that 'used' to keep all those boxes and left-over of the model kits! Then I noticed that my room is running out of space and why on earth am i keeping on this rubbish!


So I decided to throw them all away! You will be amazed by the trash and the boxes that I got! In the picture above I already thrown 80% of the runner and open all my finish boxes!


All open up Gunpla and SRW boxes! I dun think this stuff can sell at a good price since they already got things printed on to them!


The runner in that boxes there are only from 4 boxes, just imagine if i got all of them in here......it will be like a mountain!!!

Here the things that I kept for collection

The manual boxes and those runner which has some parts on it! Those part maybe useful in the future, you may used them for modding your kit.

After throwing aways all those stuff I noticed that i still has lots of kits under my bed! WTF.........when will I finish them off.......


I know a lot of you model kits builder like me out there faces this kind of problem. I just want to know how you ppl tackle with it. Throw it? or Open it up and keep it? and what so ever.

Tuesday, October 16, 2007

Revoltech Shin Getter Robo 1

Got this figure last week but have no time to post it here.


Just for your information, Shin Getter Robo 1 is not an original character of the original getter robot anime. It first appear in a manga called Getter Robo Go but it did not become famous until the Super Robot War 4 in 1995!

I felt in love with this mecha since SRW4, still remember the cool looks and super high damage attack it has, not to mention the HP and EN regen every turn.

Back to the figure! It come with 3 pair of hands (different style), 1 gigantic axe (just like the anime Shin Getter Robo Armageddon), one of its dunno called wat thing for posing the Stoner Sunshine, and a pair of wings! Overall the size of this Revoltech is much bigger than normal one, the accessories still too few!

The stoner sunshine! I think Kaiyodo should give us larger ball to show the effect


However if u are a fan of Shin Getter than you must not missed it! I think the Shin Getter Robo 2 and 3 will be coming on the following few months!


Dunno why I just like to put Mazinkaiser along with this guy


Maybe it is becoz this 2 dude are my favourite in SRW series


Here some funny thing for all of you:

Yotsuba and Black getter fighting overall a fallen ice cream

Here is a slideshow for all the picture I taken for my Shin Getter Robo, Enjoy!!!

Monday, October 15, 2007

MG Hi Nu - Complete Version

I have finally complete putting on all the decal! The decals this time arent that noticeable since i am using a dark theme and the decals are almost all in black color.


The color that i used remind me of the Gundam Sentinel Zeta A-1 and also the G-3 Gundam.....
Dunno whether the upcoming Unicorn will look good in this color scheme or not!


The view from left and right


The wings behind, it has the same design as the Destiny Gundam! But Hi Nu sure will pawn any thing from GS or GSD! Hi Nu FTW!!!

Sunday, October 14, 2007

Shading on Hi Nu

Remember my last post that I mention I was going to tried out my new AB. Here is the result on my MG Hi Nu which are have been building ages ago! Never had the time to AB it!


This is my first attempt in shading a kit! And with my dual AB in used, it doubles up the speed of shading! No more stop and wash the AB and change color! (warning a lot of picture loading below)


I have mod the head so the head join together better and u wont see a line in between! I will post how I mod the head for AB on later! Oh and also more pic on Hi Nu when i finish putting on the decal on it!

Thursday, October 11, 2007

Sparmax 0.3mm nozzle Airbrush


Just got my new 0.3 AB (airbrush) from a fellow forumer from the LYN. The reason I wanted to purchase this AB was becoz my existing 0.5 AB is facing problem doing the shading and 0.5 tends to spray large area!

However I faced a problem with the connection part where my original compressor has a bigger hole (dunno what it is called) while the AB hole is so much more smaller! Can't fit the thing!

My new AB has a smaller hole than the current

So 2 days ago I travel down to KL Petaling Street Venus Art to purchase a AB hose + a few connectors (also dunno wat to call them).

Here is all the thing that i got throughout the week


My new and old hose

With my new bought connector I was able fit my hose to my compressor, but for convenient i used T-joint to split my hose into 2. So now I can use 2 AB in one shot!


Haven't put it into action yet and will tried it out later on my Hi Nu!